

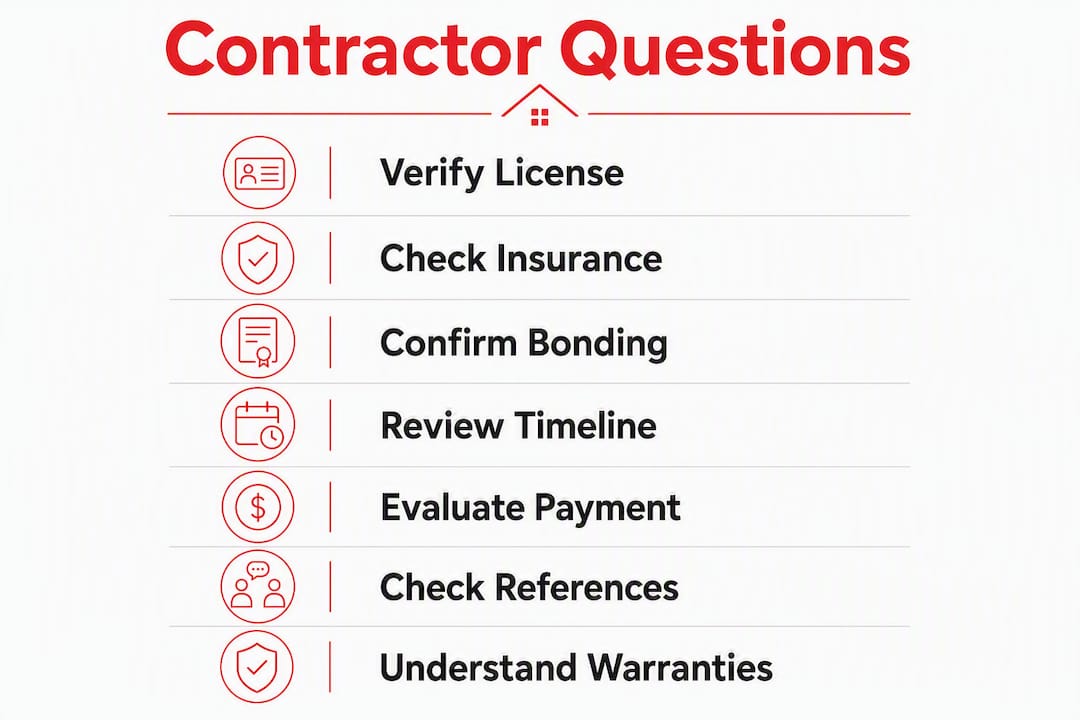
Before your first contractor meeting, have these questions ready: license number and verification, proof of insurance, who pulls permits, who runs the job daily, written timeline with milestones, line-item estimate, payment schedule, references from similar projects, warranty terms, subcontractor vetting, and the change-order approval process. Use the free homeowner checklist from Designsbydandj to bring these to every interview.
Here are the 15 essential questions to ask a contractor, with a one-line reason each one matters:
- What is your license number, and can I verify it? Confirms the contractor is legally authorized to work in your state.
- Can you provide a Certificate of Insurance today? Protects you from liability if a worker is injured or property is damaged.
- Who pulls the permits, and do you have a permit history with the local building department? Unpermitted work can void your homeowner’s insurance and create sale problems later.
- Who will be my daily on-site point of contact? Knowing who to call prevents miscommunication and missed milestones.
- What is the full project timeline, and what could cause delays? A written schedule holds the contractor accountable and sets realistic expectations.
- Can I see a line-item estimate with labor, materials, permits, and allowances listed separately? Line items let you compare bids fairly and spot likely change-order triggers.
- What is the payment schedule, and how large is the deposit? Staged payments tied to milestones protect you if work stalls.
- Can you provide three to five references from projects similar to mine? Recent references from comparable work reveal whether the contractor delivers on time and on budget.
- What warranties do you offer on workmanship, and what do manufacturer warranties cover? Knowing both protects you if defects appear after the project closes.
- Which trades will be subcontracted, and how do you vet those subcontractors? Unvetted subs can create liability and quality gaps you did not anticipate.
- How will change orders be handled, and what triggers an additional charge? A written change-order process prevents surprise invoices.
- Will you provide lien waivers before final payment? Lien waivers confirm subcontractors and suppliers were paid and protect you from mechanic’s liens.
- How do you protect floors, fixtures, and neighboring units during construction? Site protection details belong in the contract, not a verbal promise.
- What is your dispute resolution process if we disagree on scope or quality? Knowing the escalation path before a problem arises saves time and legal fees.
- Are you bonded, and can I see proof? Bonding adds a financial backstop if the contractor fails to complete the work.
Table of Contents
- What credentials should you verify before hiring a contractor?
- What must be in your written contract before you sign?
- How do you evaluate a contractor’s timeline and payment terms?
- Who actually manages your project day to day?
- How do you check a contractor’s references and past work?
- What warranty terms should you require in writing?
- How should a contractor protect your property and site?
- What are the red flags to watch for when hiring a contractor?
- How do you verify credentials and follow up after the interview?
- How Designsbydandj answers these questions
- Key Takeaways
- What reputable contractors wish you would ask them
- Designsbydandj makes the hiring process clear and stress-free
- Useful sources for verifying contractor credentials
What credentials should you verify before hiring a contractor?
Credentials are the first filter, and skipping this step is the single most common mistake homeowners make. A contractor who hesitates to share a license number or Certificate of Insurance is telling you something important before the project even starts.
License verification
Ask for the contractor’s full legal business name, license number, and the state under which they are licensed. Then verify it yourself. Every state maintains a public licensing board database where you can confirm whether a license is active, check for disciplinary actions, and see which trade categories it covers. In New York, that lookup runs through the New York City Department of Buildings or the New York State Department of Labor, depending on the trade. In New Jersey, the Division of Consumer Affairs handles contractor registration.
Do not accept a photocopy of a license card as verification. Look up the number directly on the state board’s website so you see the current status, not a snapshot from a year ago.
Insurance: general liability and workers’ compensation
Ask for a Certificate of Insurance and call the carrier directly to confirm the policy is active and covers the specific type of renovation you are planning. General handyman policies frequently exclude large-scale remodels, so the coverage type matters as much as the coverage amount. Request at minimum:
- General liability: $1 million per occurrence is a common baseline for residential projects.
- Workers’ compensation: required in most states for any contractor with employees; without it, you can be held liable for injuries on your property.
- The carrier’s name, policy number, and expiration date so you can call to verify.
Pro Tip: Ask to be listed as an additional insured on the contractor’s general liability policy for the duration of your project. This gives you direct standing to file a claim if damage occurs.
For trade-specific nuances, particularly for specialty contractors, understanding what contractor insurance actually covers helps you ask sharper questions when reviewing a COI.
Bonding and permits
A surety bond provides a financial backstop if the contractor abandons the project or fails to pay subcontractors. Ask whether the contractor is bonded, the bond amount, and the bonding company’s name so you can verify it.
On permits: FEMA’s homeowner checklist specifically recommends verifying a contractor’s bonding, permit activity in the jurisdiction, and familiarity with local code requirements. Ask the contractor to confirm in writing who will pull permits and who will be present for inspections. Then call your local building department and ask whether the contractor has an active permit history in that jurisdiction. Contractors familiar with a jurisdiction tend to have fewer permit-related delays because they know the inspectors and the local code interpretations.
What must be in your written contract before you sign?
A verbal agreement is not a contract. Every protection you negotiate disappears without a signed document that spells out scope, cost, schedule, and remedies. Here is what to require:
- Detailed scope of work: Materials specified by brand, model, and grade where possible. “Tile” is not a specification; “12×24 porcelain tile, Daltile Arctic White, matte finish” is.
- Line-item estimate: Labor, materials, permits, allowances, disposal, and contingency listed separately so you can track costs as the project progresses.
- Allowance handling: If an allowance is used for a material (say, $3,000 for plumbing fixtures), the contract should state what happens if you go over or under that figure.
- Change-order process: All changes to scope, materials, or cost must be approved in writing before work begins. The form should include a description of the change, the cost impact, and the schedule impact.
- Payment schedule: Tied to project milestones, not calendar dates. Milestone-based payments give you leverage if work stalls.
- Insurance and indemnity language: The contractor agrees to maintain coverage and indemnify you against claims arising from their work.
- Cleanup and site protection: Daily cleanup standards, dust barrier requirements, and trash disposal frequency.
- Final inspection and acceptance: The contract should define what “complete” means and who signs off.
- Warranty terms: Both workmanship and manufacturer warranty periods, in writing.
Pro Tip: Request a written change-order form as an exhibit to the contract before you sign. If the contractor does not have one, that tells you how they handle scope creep.
Deposit limits and lien waivers
Many states cap the deposit a contractor can legally request before work begins. In California, for example, the cap is 10% of the total contract price or $1,000, whichever is less. New York does not set a statutory cap, but industry practice for residential projects typically runs 10%–33% of the total contract value as an initial deposit, with subsequent draws tied to milestones.
Staged payments protect you. A common structure: deposit at signing, a draw at rough-in completion, a draw at substantial completion, and a final payment after punch-list sign-off, with payments tied closely to project milestones. Before releasing that final payment, require signed lien waivers from the contractor, all subcontractors, and major suppliers. A lien waiver confirms they have been paid and waive their right to file a mechanic’s lien against your property.
How do you evaluate a contractor’s timeline and payment terms?
A realistic schedule and a fair payment structure are two of the clearest signals of a contractor’s professionalism. Both should be in writing before you sign anything.
Ask for a written project schedule that includes:
- Start date and projected completion date
- Key milestones (demolition complete, rough-in inspections passed, finishes installed)
- Critical-path items that, if delayed, push the whole project back
- Named causes of likely delays (material lead times, permit approval windows, inspection scheduling)
Then ask directly: “What happens to the schedule if a permit takes longer than expected?” A contractor who has a clear answer has managed this before. One who deflects probably has not.
Reading the estimate
A well-structured estimate shows line items for labor, materials, permits, cleanup, allowances, and contingency and explicitly lists what is excluded. That exclusions list is where the risk lives. Ask the contractor to walk you through every exclusion and explain what would trigger an additional charge.
Pro Tip: When comparing bids, low bids can hide exclusions that surface as expensive change orders once work is underway. Ask each bidder: “What is not included in this number?” and compare the exclusion lists, not just the totals.
A sample payment schedule for a mid-size kitchen renovation might include a deposit at contract signing, followed by draws at demolition and rough-in completion, cabinet installation and rough inspections, substantial completion with finishes installed and punch list drafted, and retainage held until final inspection passed and punch list signed off.
Retainage, the amount held back until full completion, gives you financial leverage to get every last item finished. Never release it before the punch list is closed and permits are signed off.
Who actually manages your project day to day?
This is one of the most overlooked contractor interview questions, and it has a direct impact on whether your project runs smoothly. The person who sells you the job is rarely the person who shows up every morning.

Confirm exactly who will be your daily on-site point of contact and how often they will provide status updates. Ask for that person’s name, cell number, and their role: project manager, superintendent, or lead carpenter. Then ask what their current workload looks like. A project manager running six jobs simultaneously will not give yours the attention it needs.
Subcontractor questions to ask
Most general contractors subcontract specialty trades: electrical, plumbing, HVAC, tile, and sometimes framing. That is normal. What matters is how they vet and manage those subs.
- Which trades will be subcontracted on my project?
- Are those subcontractors licensed and insured in this state?
- Do you carry workers’ compensation for subcontractors, or do they carry their own?
- How long have you worked with these subcontractors?
- Will the same subcontractors be on my job from start to finish?
The workers’ comp question matters legally. If a subcontractor is injured on your property and neither the general contractor nor the sub carries workers’ comp, you may face liability.
Communication expectations
Set these in writing before work starts:
- Preferred communication channel (text, email, project management app)
- Expected response time for non-urgent questions (24 hours is reasonable)
- Weekly written status update: what was completed, what is next, any issues
- Site walk frequency with you present (weekly is standard for active projects)
- How decisions requiring your input will be flagged and by when you need to respond
For more on structuring these expectations, Designsbydandj’s guide on NYC renovation communication covers the specifics of keeping projects on track through clear, documented updates.
How do you check a contractor’s references and past work?
References are not a formality. They are your best window into how a contractor actually performs once the contract is signed.
Contact three to five previous clients from projects similar in scope and ask specific questions, not just “Were you happy with the work?”
- Did the project finish on time? If not, what caused the delay and how was it handled?
- Did the final cost match the original estimate? If not, why?
- How did the contractor communicate during the project?
- Were there any defects or issues after completion? How did the contractor respond?
- Would you hire them again for a larger project?
Verifying the portfolio
Ask for before-and-after photos of completed projects and, where possible, the permit numbers so you can verify those projects were inspected and closed out. A contractor who has pulled and closed permits on past jobs has a verifiable track record with the local building department.
Pro Tip: Ask if you can visit a recently completed project in person. Seeing finish quality, trim detail, and how tile meets cabinetry tells you more than any photo. Most satisfied clients are willing to allow a brief walk-through.
When reviewing photos, look for:
- Clean transitions between materials (tile-to-hardwood, countertop-to-backsplash)
- Consistent grout lines and caulk joints
- Trim that is tight to walls with no visible gaps
- Site cleanliness in progress photos (a messy site often signals a disorganized crew)
You can also review Designsbydandj’s project portfolio to see what documented, permit-closed renovation work looks like in practice.
What warranty terms should you require in writing?
Two types of warranties apply to most renovation projects, and they cover different things.
Manufacturer warranties cover defects in materials: the tile, the cabinets, the appliances, the windows. These warranties run with the product, not the contractor, and their terms are set by the manufacturer. Ask the contractor to provide documentation for every major material specified in your project.
Workmanship warranties cover the contractor’s labor: how the tile was set, how the cabinets were installed, how the window was flashed. These are the contractor’s own guarantee, and the terms vary widely. One year is a common minimum; two years is better for complex work.
Request a written warranty clause that includes:
- Coverage period for workmanship (start date, end date)
- What is covered and what is explicitly excluded
- Response time for warranty callbacks (48–72 hours is reasonable)
- The process for submitting a warranty claim
- What remedy the contractor will provide (repair, replace, or credit)
Dispute resolution
Ask the contractor directly: “If we disagree on whether something is a defect or on the cost of a change order, how do we resolve it?” The answer reveals a lot. A contractor who says “we work it out” with no further detail has no process. A contractor who describes a written escalation path, mediation, or arbitration has thought about it.
Include a dispute resolution clause in the contract that specifies: written notice of the dispute, a response period (10–14 days is common), and whether disputes go to mediation before arbitration or litigation.
How should a contractor protect your property and site?
Site protection is a contract item, not a courtesy. Before work begins, confirm in writing:
- Floor protection: Ram Board or equivalent over hardwood, tile, and carpet in all work paths.
- Dust barriers: Zipwall or sealed plastic sheeting between work zones and living areas.
- Fixture protection: Existing tubs, countertops, and appliances covered before demo begins.
- Daily cleanup: Debris removed from living areas each day; dumpster or haul-away scheduled.
- Trash disposal: Frequency of dumpster pulls and who is responsible for disposal fees.
- Neighbor impact: Notification to adjacent units or neighbors before noisy work begins; compliance with local noise ordinances.
Safety and OSHA compliance
Ask whether the contractor follows OSHA safety standards and whether crew members receive safety training. For permit-required work, ask who is responsible for posting the permit and ensuring inspections are scheduled. A contractor who is unfamiliar with permit-required confined space or fall protection requirements on your project is a liability risk.
A pre-start walk-through checklist should cover:
- Confirm permit is posted and visible
- Confirm dust barriers are installed before demo
- Confirm floor protection is down in all traffic areas
- Confirm dumpster placement does not block fire exits or neighbor access
- Confirm emergency contact numbers are posted on-site
What are the red flags to watch for when hiring a contractor?
Reputable contractors expect detailed questions. Evasiveness on license numbers, COIs, or references is a major red flag and a signal to keep looking.
Watch for these warning signs:
- No license number provided or verification refused: Walk away. There is no legitimate reason to withhold this.
- Request for a large cash-only deposit: Cash payments create no paper trail and no recourse.
- Unusually low bid with no explanation: A bid significantly lower than others almost always hides exclusions that will surface as change orders.
- No written contract offered: Any contractor who works on a handshake is not protecting you or themselves.
- Reluctance to provide references: A contractor with satisfied clients is proud to share them.
- Refusal to provide lien waivers: This is a legal protection you are entitled to request.
- Pressure to sign immediately: Legitimate contractors do not manufacture urgency.
- No physical business address: A P.O. box or no address at all makes accountability difficult.
Pro Tip: Do not tell a contractor your maximum budget or that you need the project done by a specific date before you have a signed contract. Both details shift negotiating leverage to their side and can inflate pricing or rush decisions that affect quality.
How do you verify credentials and follow up after the interview?
Verification takes about two hours and can save you from a costly mistake. Here is the workflow:
- License lookup: Go to your state licensing board’s website, enter the contractor’s license number and business name, and confirm the license is active with no disciplinary actions.
- COI verification: Call the insurance carrier listed on the Certificate of Insurance. Ask whether the policy is active, what it covers, and whether it covers the type of renovation you are planning.
- Permit history check: Call or visit your local building department. Ask whether the contractor has pulled permits in the jurisdiction and whether any open violations exist.
- Reference calls: Use the script below. Take notes. Compare answers across references.
- Lien waiver timing: Confirm in the contract that conditional lien waivers from subs and suppliers are due at each draw, and unconditional waivers are due before final payment.
Email templates for requesting documents
Requesting COI and license:
Subject: Document Request — [Your Name] Project at [Address]
Hi [Contractor Name], thank you for meeting with us. To move forward, please send the following: (1) your current Certificate of Insurance showing general liability and workers’ comp, with the carrier’s contact information; (2) your state contractor license number and the name under which it is registered. We will verify both directly with the issuing agencies. Please send by [date].
Requesting a detailed estimate:
Subject: Estimate Detail Request — [Your Name] Project
Hi [Contractor Name], please revise the estimate to show line items for labor, materials, permits, allowances, disposal, and contingency separately. Also list any items that are explicitly excluded from this scope. We need this before we can compare proposals.
Pro Tip: Save every email, text, and document exchanged with a contractor in a single folder labeled with the project address. If a dispute arises, your paper trail is your protection.
How Designsbydandj answers these questions
Knowing what to ask is half the work. Seeing how a professional firm answers those questions gives you a benchmark for evaluating every contractor you interview.
Here is how Designsbydandj approaches the questions homeowners ask most:
- License and insurance: Designsbydandj provides its license number, Certificate of Insurance, and carrier contact information at the first meeting. Homeowners are encouraged to verify both directly.
- Permits: The firm pulls all required permits and coordinates inspections as part of the project scope. Homeowners are notified before each inspection and receive copies of all approved permits.
- Point of contact: Every project has a named project manager who is the homeowner’s single point of contact from contract signing through punch-list close.
- Schedule and milestones: A written project schedule with milestones is included in every contract. The project manager provides weekly written updates and flags any schedule risk as soon as it is identified.
- Payment schedule: Payments are tied to milestones, not calendar dates. The firm uses a staged draw structure with retainage held until final inspection and punch-list sign-off.
- Warranty: Designsbydandj provides a written workmanship warranty on every project, with a defined callback response time and a clear claim process.
- Change orders: No scope change is executed without a signed written change order that includes the cost impact and schedule impact.
Pro Tip: A design-build firm coordinates permits, inspections, and subcontractor scheduling under one contract. That single-contract structure eliminates the coordination gaps that cause most renovation disputes, because there is one accountable party for every phase of the work.
For a detailed look at how the design-build model reduces homeowner risk, see Designsbydandj’s guide on how the design-build process works.
Key Takeaways
Hiring a trustworthy contractor requires verifying credentials independently, securing a written contract with milestone-based payments, and requiring lien waivers before final payment.
| Point | Details |
|---|---|
| Verify credentials independently | Look up the license on the state board and call the insurance carrier directly — never rely on copies alone. |
| Require a line-item contract | The contract must specify scope, materials, payment milestones, change-order process, and warranty terms in writing. |
| Use staged, milestone-based payments | Tie every draw to a completed phase; hold retainage until the punch list is signed off and permits are closed. |
| Demand lien waivers before final payment | Signed waivers from the contractor, subcontractors, and suppliers protect you from mechanic’s liens on your property. |
| Designsbydandj as a benchmark | Designsbydandj provides license, COI, written schedules, milestone payments, and workmanship warranties on every project. |
What reputable contractors wish you would ask them
Most homeowners walk into contractor interviews focused on price. That is understandable, but the questions that actually make projects run well are the ones about process, not cost.
From a contractor’s perspective, the homeowners who ask about daily communication preferences, decision deadlines, and site access windows are the ones whose projects close cleanly. When a homeowner asks “How quickly do you need my approval on a material selection before it delays the schedule?” they are signaling that they understand the project is a two-way commitment. That kind of clarity at the start prevents the most common source of delays: waiting on homeowner decisions while the crew stands by.
The question about subcontractors matters more than most homeowners realize. A general contractor who has worked with the same electrician and plumber for years has a coordination rhythm that a contractor who hires off Craigslist for each job simply does not. Ask how long the contractor has worked with their key subs. The answer tells you whether the team is a team or a collection of strangers.
One question almost nobody asks: “Where will you store materials and equipment during the project?” On a New York City brownstone or apartment renovation, this is a real logistical constraint. A contractor who has not thought about it will figure it out at your expense, literally, in the form of delays and damage.
The best contractor interviews feel like a conversation about how to make the project succeed, not an interrogation. When a contractor answers your questions with specifics, offers documentation without being asked, and asks you questions back about your priorities and timeline, that is the signal you are looking for.
Designsbydandj makes the hiring process clear and stress-free
Hiring a contractor in New York City or Northern New Jersey is genuinely complicated. Permit requirements, licensed trade rules, and building department timelines add layers that most homeowners encounter for the first time. Designsbydandj removes that complexity by handling design, permits, inspections, and construction under one contract, with one project manager accountable for every phase.

You get a written scope, a clear estimate, a milestone-based payment schedule, and a named point of contact from day one. No chasing subcontractors. No permit surprises. No wondering who to call when something comes up. If you want to see the full scope of what the firm offers before your first conversation, the design-build remodeling services page covers every project type the team handles across NYC and Northern New Jersey.
Ready to start with a clear plan? Download the free homeowner checklist and bring it to your next contractor interview, or contact Designsbydandj directly to schedule a consultation.
Useful sources for verifying contractor credentials
These are the primary resources homeowners should use to confirm credentials, permits, and financial standing before signing any contract.
| Resource | What it verifies | Where to find it |
|---|---|---|
| State contractor licensing board | License status, active/inactive, disciplinary actions, trade categories covered | Search “[your state] contractor license lookup” |
| Local building department | Permit history, open violations, inspection records for past projects | City or county building department website or office |
| FEMA homeowner contractor checklist | Bonding, insurance, permit activity, and mitigation-project familiarity | FEMA.gov |
| Insurance carrier (direct call) | COI active status, coverage type, expiration date, additional insured options | Phone number on the Certificate of Insurance |
| NARI (National Association of the Remodeling Industry) | Contractor member standing, certifications, and consumer resources | NARI.org |
| Better Business Bureau | Complaint history, rating, and accreditation status | BBB.org |
- FEMA checklist: — Particularly useful for projects in flood zones or areas subject to mitigation requirements. The checklist covers bonding, insurance, and technical familiarity questions specific to federally guided repair work.
- NARI: — The National Association of the Remodeling Industry maintains a member directory and offers consumer guidance on hiring standards and contractor certifications.
- BBB: — Check the contractor’s BBB profile for complaint history and how complaints were resolved. An unresolved complaint pattern is a meaningful signal.