

Electrical rough-in is the phase of a renovation where all the wiring, boxes, and cables are installed inside open walls before insulation and drywall go up. Get it right here, and the rest of the project runs smoothly. Miss something, and you are looking at torn-out drywall and a significantly larger bill. Understanding how electrical rough-in works in a renovation is the single most important thing you can do before your electrician shows up.
Here is what you need to act on before rough-in begins:
- Confirm every outlet, switch, and fixture location while walls are still open. Moving them later costs two to three times more.
- Check your panel capacity. Adding circuits for a kitchen remodel, EV charger, or home office may require a panel upgrade.
- Plan any future systems now. Empty conduit for an EV charger run, extra Cat6 cable to bedrooms, and reserved panel space are cheap to add during rough-in and expensive to add later.
The point of no return: Once drywall goes up, corrections are cheapest now and costly after. Any missed outlet or code violation discovered post-drywall means cutting walls, patching, repainting, and re-inspecting.
Pro Tip: Walk every room with your electrician before rough-in starts. Bring a list of every appliance, TV mount, and lighting zone. Five minutes of conversation now can save days of rework later.
Table of Contents
- What does “electrical rough-in” actually mean in a home renovation?
- How does electrical rough-in work, step by step?
- When does rough-in happen, and how long does it take?
- How should you prepare as a homeowner before rough-in starts?
- What permits, inspections, and U.S. code issues should you watch for?
- How much does electrical rough-in cost during a renovation?
- Can you DIY the electrical rough-in, or do you need a licensed electrician?
- Key Takeaways
- What we’ve learned coordinating rough-in on NYC renovations
- Designsbydandj handles rough-in coordination so you don’t have to
- Useful sources and where to check next
What does “electrical rough-in” actually mean in a home renovation?
Rough-in is the hidden skeleton of your home’s electrical system. Rough-in happens after framing and before insulation and drywall; trim-out happens after painting and flooring and includes device installation and final connections. Think of rough-in as everything the inspector needs to see before the walls close, and trim-out as everything the homeowner actually touches and sees.
| Phase | What gets installed | Homeowner decisions due |
|---|---|---|
| Rough-in | Boxes, cables, conduit, grounds, panel home-runs, nail plates | Outlet/switch locations, circuit count, panel capacity, future-proofing runs |
| Finish (trim-out) | Outlets, switches, covers, fixtures, breakers, panel labeling | Fixture styles, dimmer types, final appliance connections |
At the end of a completed rough-in, you should see:
- Electrical boxes mounted at correct heights and locations
- Cables pulled and stapled along framing members
- Steel nail plates installed wherever cables pass close to a stud face
- Ground wires spliced and visible in every box
- Home-run cables staged at the main panel, ready for breaker installation at trim-out
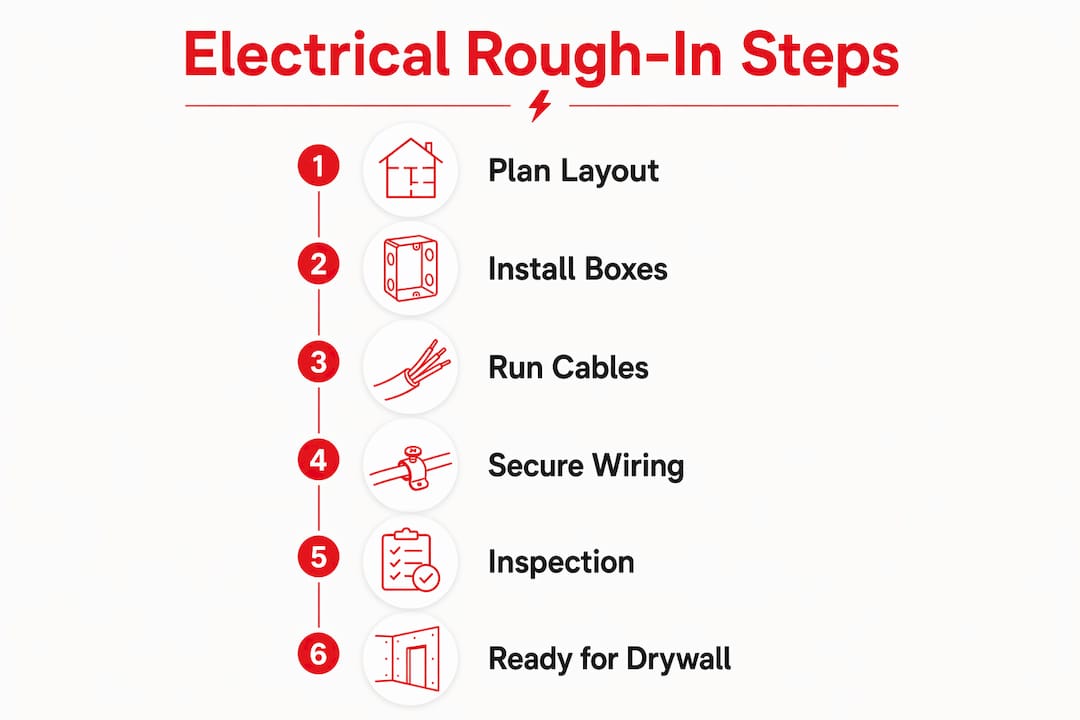
How does electrical rough-in work, step by step?
This is the sequence your electrician follows. Knowing it lets you monitor progress, catch missing work early, and prepare for the rough-in inspection.
Plan confirmation. The electrician reviews the approved drawings, walks the space with you or your general contractor, and marks box locations on the framing with a marker or chalk line. This is your last chance to adjust locations at no extra cost.
Box layout and mounting. Outlet boxes go at standard heights (typically 12–18 inches from the floor to box center; switch boxes at 44–48 inches). Ceiling boxes for fixtures are positioned per the lighting plan.
Drilling and routing. Holes are drilled through studs and plates to route cable. NEC 334.30 requires NM-B cable to be stapled within 12 inches of every box and every 4.5 feet along the run. Holes drilled within 1.25 inches of a stud face require steel nail plates.
Cable pulling and stapling. Romex (NM-B) or metal-clad cable is pulled from each box back toward the panel. Each run is stapled at the required intervals and labeled at the panel end.
Grounds and splices. Ground wires are spliced and pigtailed in every box. Grounding and bonding must be completed and visible at rough-in. Loose or unspliced grounds are one of the most common causes of a failed inspection.
Conduit and subpanel work. Dedicated circuits (EV charger, HVAC, range, dryer) may run in conduit. Subpanel home-runs are pulled and staged.
Panel staging. Home-run cables are staged in the panel during rough-in; breaker installation and labeling are completed at trim-out. The inspector will see wires entering the panel but not yet landed on breakers.
What the inspector checks at rough-in: Box mounting, cable fastening, box fill, sufficient wire left for trim-out, conductor sizing, nail plates, and grounding. Box fill is calculated by counting conductor equivalents by gauge and device against the box’s cubic-inch rating. An overfilled box fails inspection, and you cannot close the wall until it is corrected.
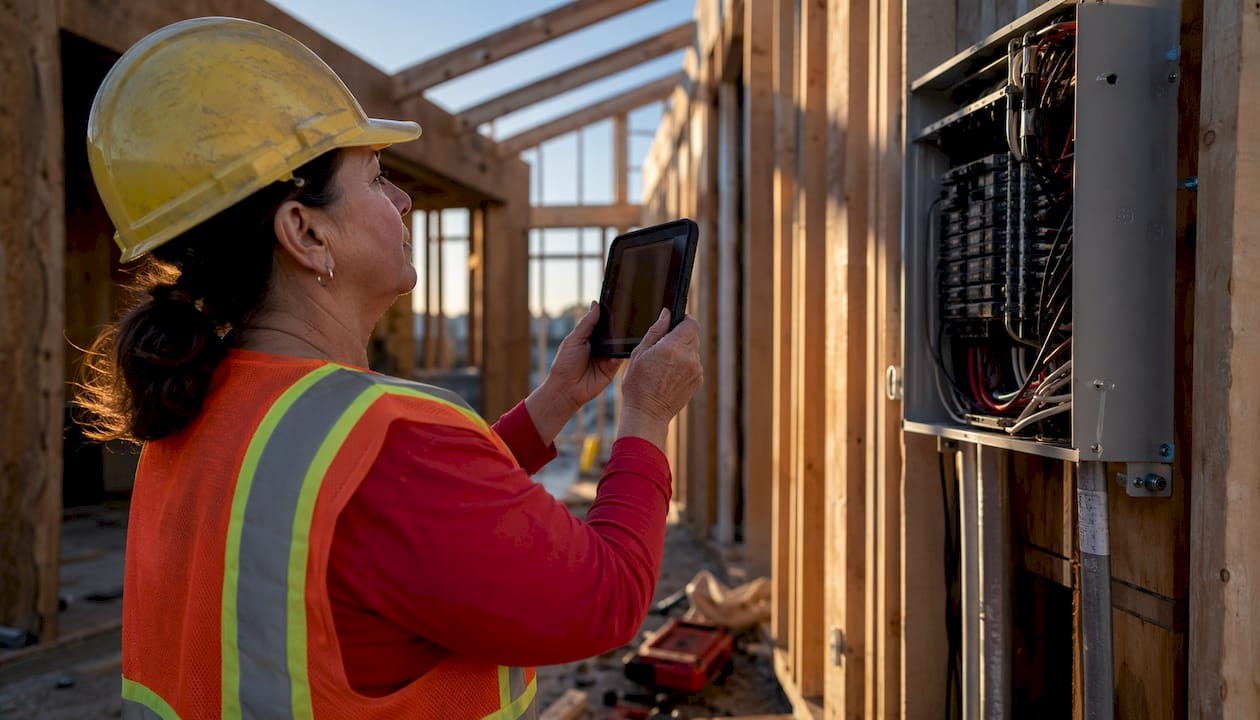
Pro Tip: Photograph every wall cavity before insulation goes in. Capture box locations, cable routes, and nail plate positions. These photos protect you during change-order disputes and give the next electrician a map if work is needed years later.
When does rough-in happen, and how long does it take?
Sequencing trades correctly is what separates a smooth renovation from a costly one. The standard order is:
- Framing complete before any rough-in trade begins
- HVAC rough-in next, because ducts claim the most space and are hardest to reroute
- Plumbing rough-in after HVAC, for the same reason
- Electrical rough-in last among the mechanical trades, so cables can fit around pipes and ducts
Experienced electricians recommend waiting until plumbing and HVAC roughs are complete so electrical can route around existing obstructions. Skipping this order creates conflicts that force one trade to redo work.
Typical durations, by scope:
- Single room: 1–2 days
- Kitchen: 2–3 days
- Whole-house remodel: 3–7 days, depending on panel work and circuit count
- Complex systems (EV charger, solar, subpanels, smart-home wiring): add 1–3 days to any of the above
After rough-in is complete, the inspector must visit and sign off before insulation goes in. Build at least 48–72 hours into your schedule for inspection scheduling. In busy permit offices, that window can stretch longer, so call ahead.
How should you prepare as a homeowner before rough-in starts?
The decisions you make before the electrician arrives determine what you live with for the next 20 years. Walls are open for a short window, and changes made during rough-in cost a fraction of what they cost afterward.
Work through this checklist before rough-in day:
- Outlet and switch locations: Walk every room and mark desired locations with painter’s tape. Note heights for any special applications (above counters, behind TVs, in islands).
- Lighting zones: Decide which areas need dimmer-controlled circuits, accent lighting, or under-cabinet LEDs. A solid lighting plan locks these decisions in before rough-in.
- Dedicated appliance circuits: List every high-draw appliance: refrigerator, dishwasher, microwave, range, washer, dryer, HVAC equipment.
- Future-proofing runs: Use the open-wall moment to add low-cost future-proofing: empty conduit for a future EV charger run, extra Cat6 to bedrooms and media walls, and reserved panel space for future breakers. The cost difference between pulling one cable and two cables through the same hole is minimal.
- Trade coordination: Confirm that HVAC rough-in is complete before your electrician starts. Conflicts between duct runs and cable routes are a common source of delays.
Pro Tip: Use chalk lines or painter’s tape on the framing to mark every outlet, switch, and fixture location before the electrician arrives. It takes 30 minutes and eliminates the most common source of “that’s not where I wanted it” conversations after drywall.

What permits, inspections, and U.S. code issues should you watch for?
Pulling a permit is not optional for most electrical work in a renovation. Relocating outlets, adding circuits, replacing a panel, or running new home-run cables all typically require a permit and a rough-in inspection. The permit process protects you: unpermitted work can complicate home sales, void insurance claims, and create liability if a fire occurs.
Key NEC and inspection items to verify during rough-in:
- AFCI protection: The National Electrical Code requires arc-fault circuit interrupter protection in bedrooms, living rooms, kitchens, and most other habitable spaces in new and remodeled circuits. AFCI/GFCI requirements can trigger panel upgrades or additional dedicated circuits even during minor remodels.
- GFCI protection: Required within 6 feet of any sink, in bathrooms, garages, outdoors, and unfinished basements.
- Box fill: Every box must be sized for the number of conductors it contains. The inspector calculates conductor equivalents and rejects overfilled boxes.
- Nail plate protection: Steel nail plates are required wherever cable passes within 1.25 inches of a stud or joist face.
- NM-B stapling: Cable must be stapled within 12 inches of every box and every 4.5 feet along the run.
- Conductor sizing: Wire gauge must match the breaker amperage and the load on each circuit.
- Grounding and bonding: All grounds must be spliced and visible at rough-in inspection.
Check your local Authority Having Jurisdiction (AHJ). The NEC sets the national baseline, but your city or county building department may adopt amendments or have different inspection scheduling requirements. In New York City, for example, the NYC Electrical Code governs alongside DOB permit timelines. Always confirm with your local building department before scheduling the rough-in inspection.
How much does electrical rough-in cost during a renovation?
Electrical work typically represents a notable portion of total renovation costs, and rough-in labor is the largest portion of that. For remodel work, electricians commonly charge $75–$150 per hour depending on region and crew size. A whole-house rough-in for new construction runs $6,000–$12,000 including materials; remodel rough-in is usually quoted hourly because hidden conditions (old wiring, unexpected framing, asbestos) can change scope quickly.
Primary cost drivers:
- Panel upgrades: Adding circuits for AFCI compliance or new loads often requires upgrading from a 100-amp to a 200-amp panel. Panel work adds significant cost and time.
- Circuit count: More circuits mean more cable, more boxes, and more labor hours.
- Recessed lighting: Each can requires a box, a cable run, and a home-run or daisy-chain connection.
- Conduit runs: Metal-clad or conduit installations (required in some jurisdictions or for exposed runs) cost more than Romex.
- Permit and inspection fees: These vary by municipality but should be budgeted as a line item.
- Legacy wiring: Knob-and-tube or aluminum branch-circuit wiring discovered during demo can require a full or partial rewire before rough-in can proceed.
Include a 10–20% contingency in your electrical budget. Questions to ask your electrician before signing a contract: Is the quote time-and-materials or fixed price? What triggers a change order? How are permit fees handled? What happens if old wiring is discovered?
Can you DIY the electrical rough-in, or do you need a licensed electrician?
Most jurisdictions require a licensed electrician for any permitted electrical work, including rough-in. Even in states that allow homeowner-performed electrical work on owner-occupied single-family homes, the work must still pass inspection. Panel work, multi-wire branch circuits, and service entrance work are almost universally restricted to licensed electricians.
When a licensed electrician is required:
- Any work requiring a permit in your jurisdiction (which covers most rough-in tasks)
- Panel replacement, service upgrade, or new subpanel installation
- Multi-wire branch circuits and 240-volt dedicated circuits
- Commercial properties or multi-family buildings
- Any jurisdiction that does not allow homeowner-performed electrical work
If you are a competent DIYer in a jurisdiction that permits it, you may be able to assist with non-panel tasks like mounting boxes or drilling holes under an electrician’s supervision. But the permit, inspection, and final sign-off still require a licensed professional in most cases.
Vetting an electrician before hiring:
- Verify state license and insurance (general liability and workers’ comp)
- Confirm they will pull the permit and handle inspection scheduling
- Ask for references from similar renovation projects
- Get a written scope of work, schedule, and payment terms
- Confirm they are familiar with your local AHJ’s requirements
Common DIY pitfalls that cause failed inspections or fire risk:
- Skipping nail plates on cables near stud faces
- Overfilling boxes without calculating conductor equivalents
- Leaving grounds unspliced or loose in boxes
- Stapling cable at incorrect intervals
- Using the wrong wire gauge for a circuit’s amperage
Key Takeaways
Electrical rough-in is the renovation phase where every wiring decision gets locked in, and fixing mistakes after drywall costs far more than getting it right the first time.
| Point | Details |
|---|---|
| Plan locations before rough-in | Decide every outlet, switch, and fixture location while walls are open; changes after drywall cost two to three times more. |
| Check panel capacity early | AFCI/GFCI requirements and new loads often require a panel upgrade; confirm capacity before rough-in begins. |
| Permit and inspection are required | Most electrical rough-in work requires a permit and a rough-in inspection before insulation or drywall can go up. |
| Future-proof during rough-in | Add empty conduit, extra Cat6 runs, and reserved panel space now; the marginal cost during rough-in is minimal. |
| Designsbydandj coordinates end-to-end | For NYC and Northern New Jersey renovations, Designsbydandj manages permit handling, trade sequencing, and rough-in coordination so nothing gets missed. |
What we’ve learned coordinating rough-in on NYC renovations
The part of electrical rough-in that most homeowners underestimate is not the wiring itself. It is the coordination. In a New York City brownstone or apartment renovation, you are often working with a DOB permit timeline, a plumber who needs to finish before the electrician can start, and an inspector who has a two-week backlog. Miss one handoff and the whole project stalls.
What we have seen repeatedly is that the homeowners who have the smoothest rough-in phases are the ones who made their outlet and lighting decisions before demolition started, not during rough-in. When an electrician arrives and the homeowner is still deciding where the kitchen island outlets go, that indecision costs real money in idle labor time.
The other thing worth saying plainly: the open-wall moment is genuinely short. We have seen clients add an EV charger conduit run for a few hundred dollars during rough-in that would have cost several times that after drywall. The same logic applies to a media wall with structured cabling, a dedicated circuit for a home office, or smoke alarm interconnect wiring. These are not luxury add-ons. They are the kind of decisions that make a home work well for the next decade.
If you are planning a renovation in New York City or Northern New Jersey and want a firm that handles permit coordination, trade sequencing, and inspection scheduling as part of the project, that is exactly what we do at Designsbydandj.
Designsbydandj handles rough-in coordination so you don’t have to
Electrical rough-in is where renovation projects either stay on schedule or fall apart. At Designsbydandj, we manage the entire process for homeowners in New York City and Northern New Jersey: permit applications, trade sequencing, pre-rough-in checklists, and inspection scheduling. You get a clear timeline, a single point of contact, and no surprises when the inspector shows up.

Our design-build remodeling services cover everything from initial layout planning and panel upgrade coordination to subcontractor management and final sign-off. Whether you are renovating a Brooklyn brownstone, a Tribeca loft, or a Northern New Jersey home, we bring the same organized, step-by-step process to every project.
Ready to plan your renovation the right way from the start? Use our NYC renovation calculator to get a realistic cost estimate, then reach out to schedule a consultation. We will walk you through scope, budget, and timeline before a single wall opens.
Note: Always verify permit requirements and inspection timelines with your local Authority Having Jurisdiction before work begins.
Useful sources and where to check next
- National Electrical Code (NEC): The baseline standard for all U.S. electrical installations. Your local AHJ adopts a version (often with amendments); confirm which edition applies in your jurisdiction.
- Your local building department: Search “[your city] building department electrical permit” to find permit applications, fee schedules, and inspection request procedures.
- NYC Electrical Upgrade Renovation Process: A homeowner’s guide to panel upgrades and permit coordination in New York City.
- NYC Renovation Questions Answered: Cost, permit, and timeline guidance specific to NYC renovation projects.
- Renovation Red Flags Brooklyn Homeowners Must Know: Common inspection failures and on-site issues to watch for during early construction phases.
- South Dakota Homeowner Wiring Manual (SDAR): A useful plain-language reference for understanding rough-in inspection requirements, even outside South Dakota, because it explains the NEC inspection process in homeowner-friendly terms.
Always verify your local AHJ’s specific rules and inspection scheduling requirements before starting any electrical work. Code editions, permit fees, and inspection timelines vary by municipality, and what applies in one city may differ significantly in the next.