

A lighting plan for renovation is a scale drawing that shows the exact location of every fixture, switch, circuit, and control zone before a single wire is run. Known in the industry as a reflected ceiling plan or lighting layout plan, it serves as the foundation document for electricians and designers during construction. Getting this document right before your renovation starts is the single most important step you can take to avoid expensive rework and end up with a home that actually feels good to live in. Tools like RoomSketcher make it easy to draft your own layout, and LED fixtures are now the industry standard for efficiency and longevity.
How does a lighting plan work in a renovation?
A lighting plan works by translating how you use each room into a precise map of light sources, controls, and zones. It forces you to think through every activity, from cooking to reading to watching TV, and assign the right type and amount of light to each one. Without this map, electricians default to a single ceiling fixture per room, which is the most common and most regrettable lighting mistake in residential renovation.
The plan also defines which fixtures connect to which circuits and switches. That wiring structure determines how much flexibility you have for years to come. Change it after the walls are closed, and you are looking at major demolition.

What are the three layers of lighting and how do they work together?
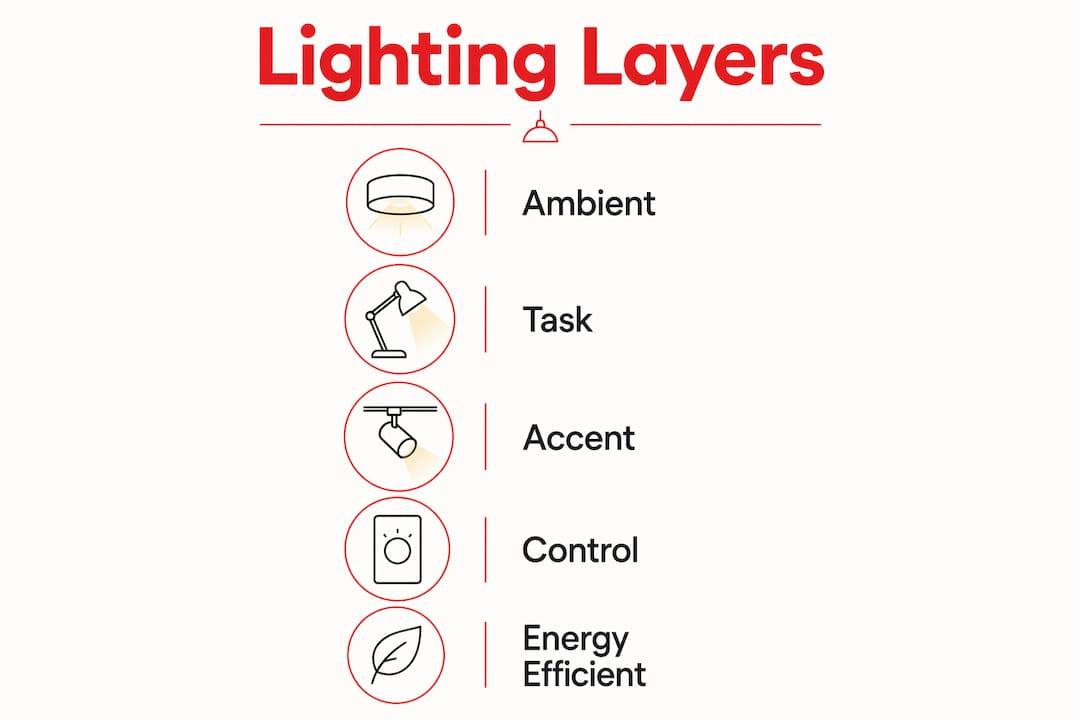
A successful lighting plan relies on three layers: ambient, task, and accent lighting, each controlled on its own circuit for best effect. Each layer serves a different purpose, and together they prevent the flat, uninspired look that comes from relying on a single overhead source.
Here is what each layer does:
- Ambient lighting is the base layer. It provides general illumination across the room. Recessed downlights, flush mount fixtures, and ceiling fans with lights all qualify. This is the layer most homeowners plan for and the one that is least sufficient on its own.
- Task lighting targets specific work areas. Under-cabinet lights in a kitchen, a pendant over a desk, or a vanity bar in a bathroom all fall into this category. Task lighting reduces eye strain and makes functional spaces actually work.
- Accent lighting adds depth and visual interest. Wall sconces, picture lights, LED strip lights behind shelving, and toe-kick lighting are all accent sources. This layer is what separates a room that looks designed from one that just looks lit.
Each layer needs its own switch or dimmer. Running them on separate circuits before construction is straightforward. Running them on separate circuits after construction is nearly impossible without major rework.
Pro Tip: Never rely on a single ceiling downlight as your only source. Rooms lit only from above feel like caves regardless of how many fixtures you install. Vertical light, meaning light that hits walls and art, is what makes a space feel open and inviting.
When and how should you develop your lighting plan during a renovation?
Timing is everything. A contractor-ready lighting plan must be finalized before site work begins and electrical rough-ins occur. Changing the plan after conduits are laid or ceilings are closed can be significantly more expensive, or in some cases, impossible.
Follow these steps to develop your plan at the right time:
- Start with your floor plan. Sketch or print your room layout to scale. Mark doors, windows, and permanent features like islands or fireplaces.
- Add your furniture layout. Lighting should respond to where people actually sit, cook, and work, not to the geometric center of the room.
- Assign lighting layers to each zone. Identify which areas need ambient, task, or accent light. A kitchen island needs task lighting above it. A reading chair needs a floor lamp or a directed downlight.
- Mark fixture locations, switch positions, and circuit groups. This is where your sketch becomes a plan. Every fixture gets a location. Every switch gets a position near a door or entry point.
- Coordinate with your ceiling contractor before framework is fixed. Adding lights after ceiling finishes exponentially increases labor and material costs. Get your cutout locations confirmed before drywall goes up.
- Test your plan with mockups. Tape circles on the ceiling where fixtures will go. Walk the room at different times of day to check coverage and shadows.
Pro Tip: Visit the space at dusk with a portable LED lamp and hold it at the height of each planned fixture. This gives you a real sense of how the light will fall before anything is permanent.
How to place lights and switches effectively in your renovation lighting plan
Fixture placement is where most homeowners make their biggest mistakes. The instinct is to center lights in the room or space them evenly across the ceiling. The right approach is to center lights on activity zones, not on the room itself.
Positioning fixtures around activity zones
A kitchen with an island needs a pendant or cluster of pendants centered on the island, not on the kitchen as a whole. A living room reading nook needs a directed source aimed at the chair, not a downlight in the middle of the room. Always ask: what is happening here, and what does that activity need?
Avoiding the cave effect with vertical light
Rooms feel smaller and less inviting with only ceiling downlights, regardless of how many you install. Wall sconces, uplights, and picture lights add vertical brightness that makes ceilings feel higher and spaces feel warmer. Plan at least one vertical light source per room.
Switch placement and zoning
Switch positions must be planned before your electrician routes conduits. Retrofitting switches after plastering is one of the hardest and most overlooked corrections in renovation. Place switches at every entry point to a room, and group them logically so you are not hunting for the right one in the dark.
Here is a quick comparison of common placement mistakes versus better practice:
| Common mistake | Better practice |
|---|---|
| One switch at one door | Switches at every entry point |
| Lights centered in the room | Lights centered on activity zones |
| All fixtures on one circuit | Each layer on its own circuit |
| No dimmer controls | Dimmers on ambient and accent layers |
| Ignoring furniture layout | Plan fixtures after furniture is placed |
Use dimmers on your ambient and accent circuits. Dimmers give you the ability to shift a room from bright and functional to calm and atmospheric without changing a single fixture.
What are the benefits of energy-efficient fixtures and smart controls?
The Department of Energy recommends LEDs for any lighting used more than two hours per day, especially in kitchens and living spaces. LEDs use a fraction of the energy of incandescent bulbs and last significantly longer. That combination makes them the clear choice for any renovation.
Smart controls take the benefits further. Here is what they add to your lighting plan:
- Scene setting: Program a “dinner” scene that dims the dining pendant and turns off the kitchen task lights, all with one tap.
- Remote access: Adjust lights from your phone when you are not home, which matters for security and energy use.
- Individual zone control: Smart dimmers let you control each circuit independently, which is exactly what a layered lighting plan requires.
- Energy monitoring: Some systems track consumption by circuit, so you can see which zones are drawing the most power.
Lighting zones with individual dimming and smart control provide flexibility and comfort that a single-switch setup simply cannot match. The wiring for smart controls must be planned before rough-ins, just like everything else. You cannot add smart zoning after the walls are closed without significant cost.
Atmosphere in lighting comes from vertical brightness, zoning, and adjustability, not from expensive fixtures alone. A well-planned layout with basic LED fixtures and good dimmers will outperform a poorly planned layout with premium fixtures every time.
Key takeaways
A renovation lighting plan works because it locks in fixture locations, circuit groups, and switch positions before construction begins, making every other decision easier and less expensive.
| Point | Details |
|---|---|
| Plan before rough-ins | Finalize your lighting layout before conduits are run or ceilings are closed. |
| Use three lighting layers | Ambient, task, and accent lighting each serve a distinct purpose and need separate circuits. |
| Place lights on activity zones | Center fixtures on where people work and sit, not on room geometry. |
| Add vertical light sources | Wall sconces and uplights prevent the cave effect that downlights alone create. |
| Choose LEDs and dimmers | LEDs save energy long-term, and dimmers give you scene flexibility without rewiring. |
What we have learned from planning lighting with homeowners
The most consistent mistake we see is treating lighting as a finish, not a system. Homeowners spend months choosing tile and cabinet hardware, then make lighting decisions in the final week before drywall. By that point, the electrician has already routed conduits, and the options are limited.
Switch placement is the other area that catches people off guard. You can have a beautifully layered lighting plan and still end up frustrated every night because the switches are in the wrong spots. We always walk the space with clients and physically point to where each switch will land before anything is wired.
Testing matters more than most people expect. Testing dimming settings on site during day and dusk validates the plan before finishes become permanent. We have caught flicker issues, coverage gaps, and color temperature mismatches during site tests that would have been costly to fix after installation.
Good lighting planning also pays off at resale. Homes with layered, well-controlled lighting photograph better and show better. That is a real financial return on a decision that costs nothing extra if you make it at the right time.
— D&J
Lighting planning is part of what Designsbydandj does from day one
At Designsbydandj, lighting is not an afterthought. We build it into the renovation plan from the first conversation, alongside scope, budget, and timeline.

Our design-build remodeling process includes coordinating your lighting layout with ceiling contractors, electricians, and your overall renovation schedule so nothing gets missed. We help you define your zones, select fixtures, and produce a contractor-ready plan before a single wall opens. If you are planning a renovation in NYC or NJ and want lighting that actually works for how you live, we are ready to help. Learn more about our design-build services and what the process looks like from start to finish.
FAQ
What is a lighting plan in a renovation?
A lighting plan is a scale drawing that shows the exact location of every fixture, switch, circuit, and control zone in a room. It serves as the working document for electricians and designers during construction.
When should a lighting plan be finalized?
A lighting plan must be finalized before electrical rough-ins and ceiling work begin. Changing fixture locations or switch positions after conduits are laid is significantly more expensive, or in some cases not possible.
What are the three layers of lighting?
The three layers are ambient, task, and accent lighting. Each serves a different purpose and works best when controlled on its own circuit with a dedicated dimmer.
How do I avoid the cave effect in my renovation lighting?
Add vertical light sources such as wall sconces, uplights, or picture lights alongside your ceiling fixtures. Rooms lit only from above feel smaller and less inviting regardless of how many downlights are installed.
Do I need smart controls in my lighting plan?
Smart controls are not required, but they add meaningful flexibility. They allow scene setting, individual zone control, and remote access, all of which require the correct wiring to be planned before construction begins.